3D Graphs
Are you still using the traditional 2D graph for your reports and presentations? This tutorial will show you how to create 3D graphs with Illustrator CS2 at ease.
Required: Illustrator CS2+
1. Create the Graph
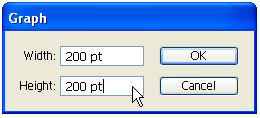
Select the Pie Graph Tool, click on the Artboard/screen, then enter 200×200px.
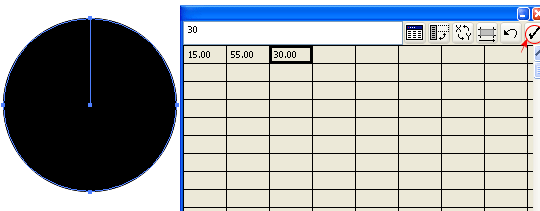
Data Table
Your graph data table will pop-up like the image below. Enter 15, 55, 30 and then click on the check mark to apply changes. Close the data table.
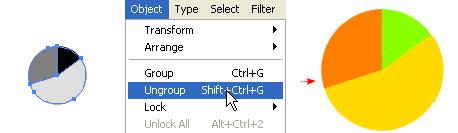
2. Ungroup the Graph
You need to ungroup or break the graph into parts in order to apply colors and effects to each individual piece. With the graph selected, go to Object > Ungroup or press Ctrl+Shift+G to break-up the graph into individual parts. There will be a warning box with this message: After a graph is ungrouped you will no longer be able to access its graph style, its data or change its graph designs. Click Yes. Now Ungroup again to break the object into pieces. Fill with any color you want and remove the stroke color.
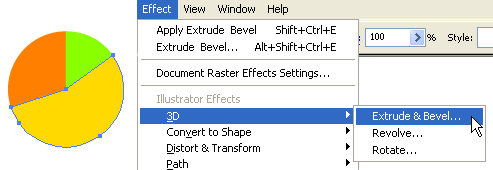
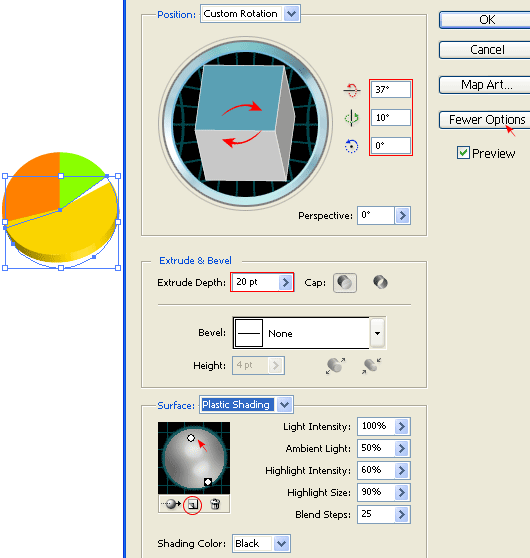
3. Apply Extrude & Bevel
Select any piece(I’ve selected yellow here), go to Effect > 3D > Extrude & Bevel.
3D Extrude & Bevel option
Expand the window by clicking on More Options. Now you may drag the cube on the left to specify the Rotation or enter the X-Y-Z Axis values manually. Enter 20pt for Extrude Depth. Add one more Light by clicking on the New Light icon and drag it as shown below.
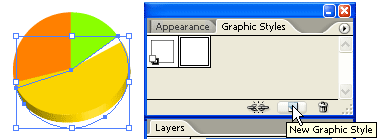
4. Make a Graphic Style
With the yellow piece selected, in the Graphic Styles pallate, click on the New Graphic Style icon. If your Graphic Styles pallate is not showing, go to Window > Graphic Styles or press Shift+F5.
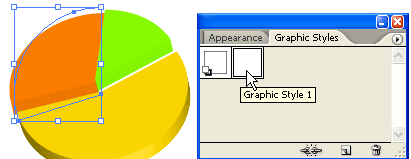
5. Apply Graphic Styles
Now select the orange and green piece, click on the Graphic Style you’ve created in the previous step to apply the styles to the orange and green piece.
Final
To finish off, reposition the pieces of the pie. Notice after you have applied the Graphic Styles, the pie is off a bit, use the Selection Tool and put them back together. Now you have a nice colorful 3D pie graph.

Bonus Tips
You can use the same technique to create the bar graph like the image below. Click here to download the source file for this Bar Graph sample.


